Oracle Blockchain Cloud Service — Fabric Network Configurations

by Juarez Junior
Introduction
The previous blog posts introduced the Oracle Blockchain Cloud Service as well as providing the steps on how to configure the Network Founder Instance and a Participant Organization instance.
Now we have to perform the Fabric network configurations, including the ones required for peers, channels, security, and other components. This blog post provides the steps required to perform such configurations.
You can check the official documentation and the related steps by using a couple of resources provided by the official documentation: Manage the Organization and Network and Extend the Network.
This blog post then has the summarized steps that will allow you to configure the Oracle Blockchain Cloud Service instances along with many screenshots. However, it is not meant to replace the official documentation.
So without further ado, let’s configure our Blockchain network as per the Hyperledger Fabric requirements and conventions.
The previous blog posts explained how to access your OBCS instances, please perform the same steps again.
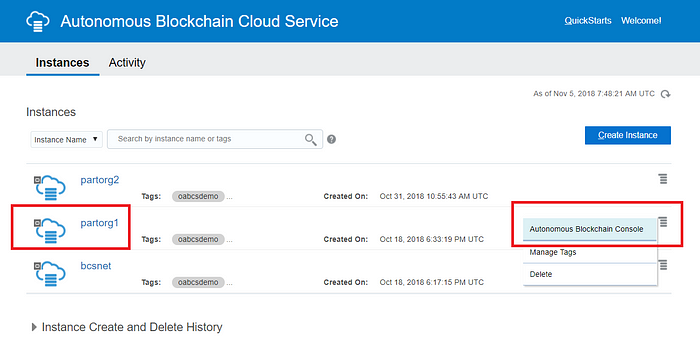
Let’s start with the network founder artifacts. You need to access the network founder console in order to export the required configuration artifacts.
Select the hamburger interface option as below and then click the Autonomous Blockchain Console option as shown below:

The console for the network founder will be shown then.

Export the Network Founder configurations
On the main screen, select the Network tab. Then select the hamburger option for the network founder instance (bcsnet) as shown below, then select the Export Certificates option, and save the file in a separate folder as you will need it shortly.
Perform the same step and then select the Export Ordering Settings option and save the file again.

As an example, we have separate directories for the Network Founder configuration artifacts as well as for each Participant org as shown below:
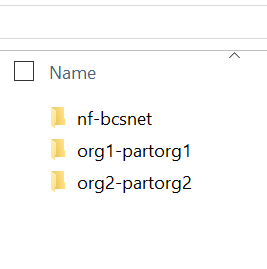
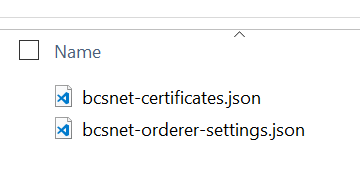
You can access the nf-bcsnet directory (the one that belongs to our Network Founder) and you will see the configuration files that we exported and saved in the previous steps:
The Participant Organization and their consoles
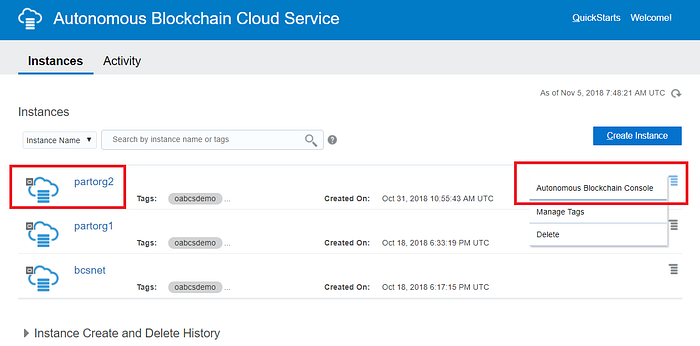
Now let’s work with the participant organizations' artifacts. You need to access the participant organization consoles in order to export the required configuration artifacts.
The participant organizations need to join a Blockchain network that belongs to a given Network Founder.
In summary, in the steps below we will perform the steps required to join a network:
1. Go to your console’s Network tab and use the Export Certificates option to export your organization’s certificates to a JSON file.
2. Send the JSON file to the founding organization. The founding organization imports this file to add you to the network.
3. Go to your console’s Network tab and use the Import Orderer Settings option to import the founding organization’s orderer settings.
Select the hamburger interface option as below and then click the Autonomous Blockchain Console option as shown below for each participant organization.
The console screen for each organization will be shown:
In case you have more Participant Organizations, perform the same step again.
Export the Participant Organizations configurations
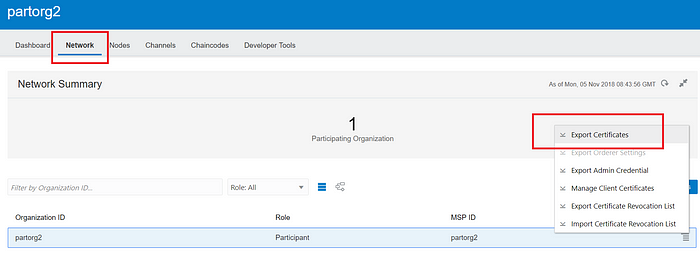
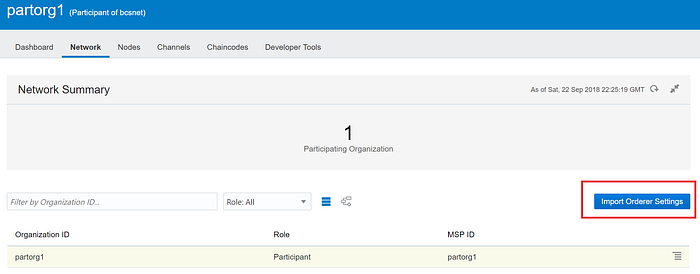
On the main screen, select the Network tab. Then select the hamburger option for the respective participant organization (partorg1 or partorg2) instance as shown below and select the Export Certificates option.
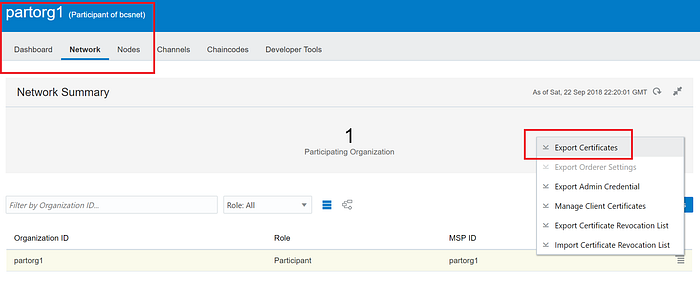
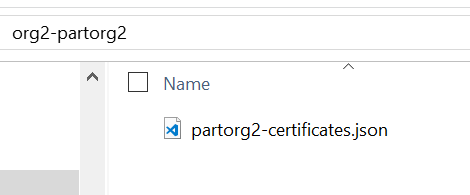
Save the certificate file in the respective folder as required.
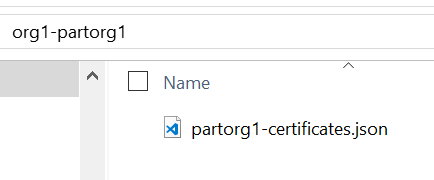
Perform the same steps for a second Organization.
Import the Orderer Settings into each Participant Organization
On the main screen, select the Network tab. Then select the hamburger option for the respective participant organization (partorg1 or partorg2) instance as shown below and click the Import Orderer Settings button, select the Import option.

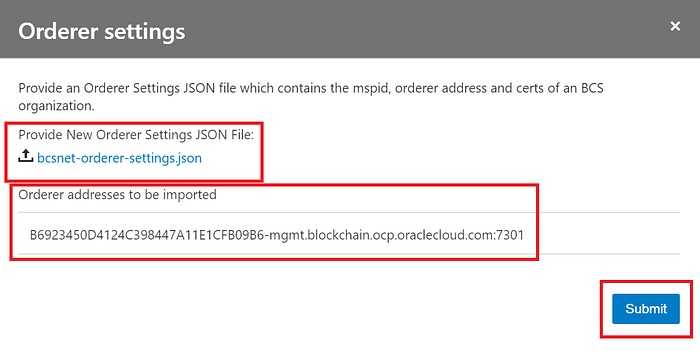
The window below will be shown. Select the JSON file for the ordered settings as exported in the previous steps (bcsnet-orderer-settings.json).
You can confirm the orderer information as shown below as a double check, then click the Submit button. A success message will be shown.
Perform the same steps above for the remaining Participant Organization, that is partorg2 of this guide for example.
Import each Participant Organization certificate into the Network Founder
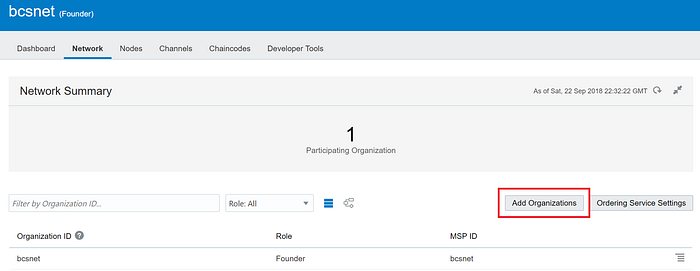
On the main screen of the Network Founder console, select the Network tab. Then click the Add Organizations button as shown below:
The screen below will be shown. Select the organization certificate file for each participant organization in your network. In our example we have a couple of files for both partorg1 first, then partorg2 second.
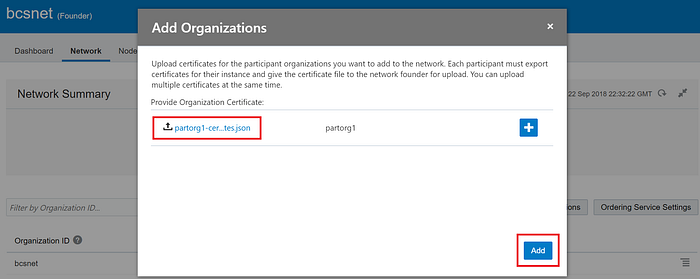
The window below will be shown. Select the JSON certificates to file for the given participant organization as exported in the previous steps (partorg1-certificates.json and partorg2-certificates).
You can confirm the participant organization’s information as shown above as a double check, then click the Add button. A success message will be shown.
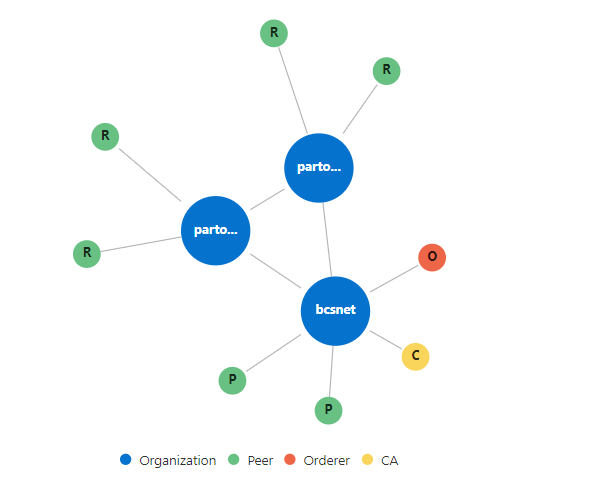
After all the import procedures, you can check the network topology view. Select the Network Tab, and click the Topology View icon. You will see the participant organizations now as part of this Blockchain network.
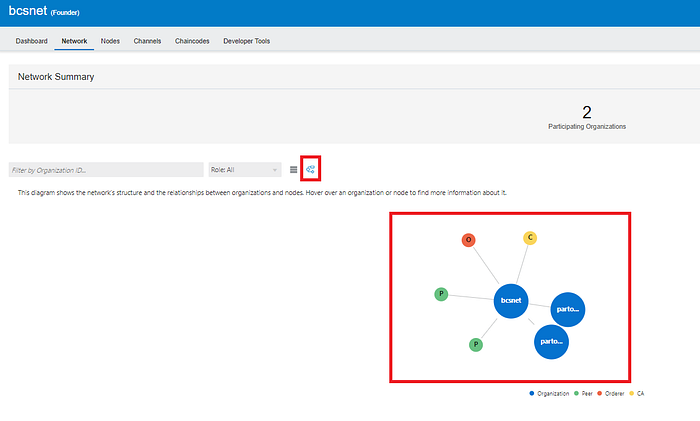
However, the node peers of each organization are now shown yet as you can see above. That is because those are what we call remote nodes.
In order to allow the Network Founder to see the remote nodes that belong to our Participant Organizations, we need to export their configurations and import them into the Network Founder configuration. The steps below show how to achieve that.
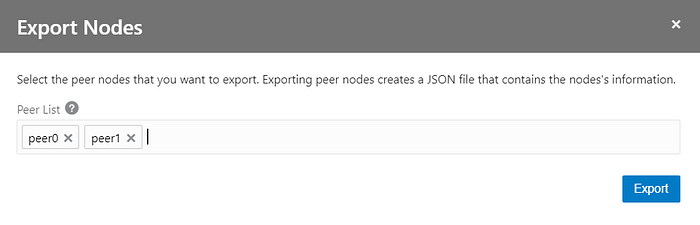
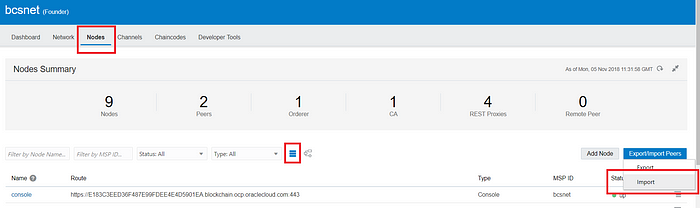
Go to your first Participant Organization’s console, select the Nodes tab, and click the select List View. Now click the Export / Import Peers button.
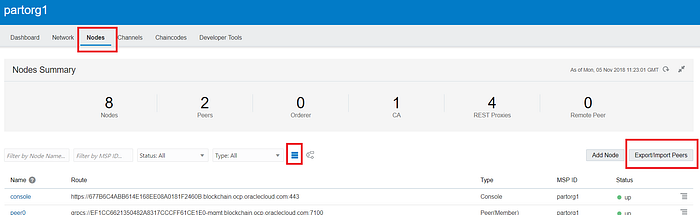
Select the peers to export, then click the Export button. Save the file in the same directory where the certificates for the first Participant Organization are located.
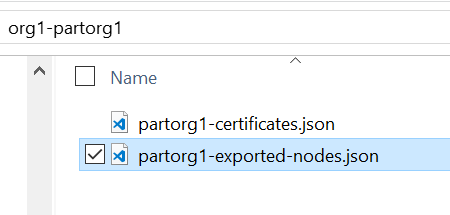
The resulting JSON file with the peer's information (partorg1-exported-nodes.json) will be saved and available as below:
Perform the same steps above for the second Participant Organization (partorg2).
Now the last step is to import the remote peer node files into the Network Founder configuration.
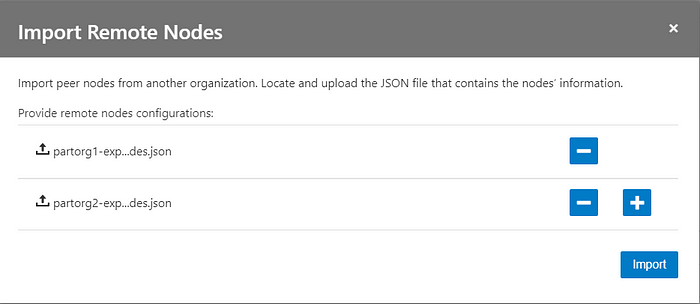
Go to the Network Founder console, select the Nodes tab again, then select the List View and click the Export / Import Peers button. Select the Import option.
Select the corresponding remote peer nodes files as shown below and click the Import button.
Now you can check the network topology view again. Select the Network Tab, and click the Topology View icon.
You will see the remote nodes of those Participant Organizations now as part of this Blockchain network.
Channels Configurations
The channels enforce the logical separation of a Blockchain network by isolating a defined group of participants, related peer nodes, ledgers, chain code, and related transactions.
It is the first level of permissions security that can be enforced from a Blockchain point of view.
As shown in the Instance Creation guide, when you create the Blockchain network a default channel is provided out-of-the-box by the template.
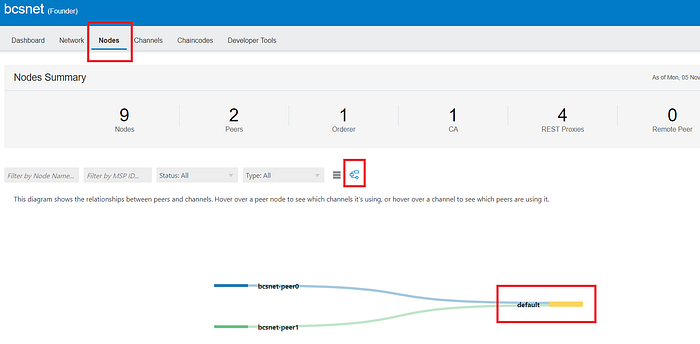
In order to see it, access the Network Founder console, select the Nodes tab, then click the Topology View icon as shown below.
You will see a graphical representation as shown below:
We can use the channel and add more Participant Organizations to it along the related peer nodes that belong to each Participant.
However, you can also create new channels to implement additional isolation among different Participant Organizations, depending on how you want to logically divide them.
Create a new Channel
The steps below show to create a new channel:
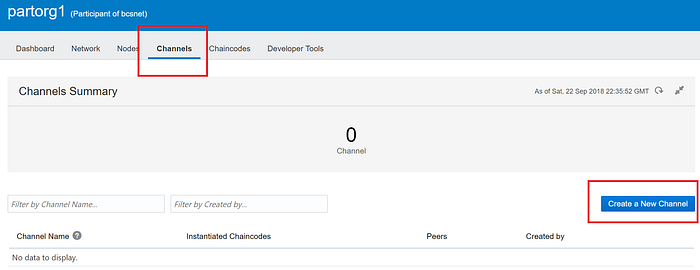
Let’s use the first Participant Organization console (partorg1) and create a channel.
Select the channels tab and click the Create a New Channel button as shown below:
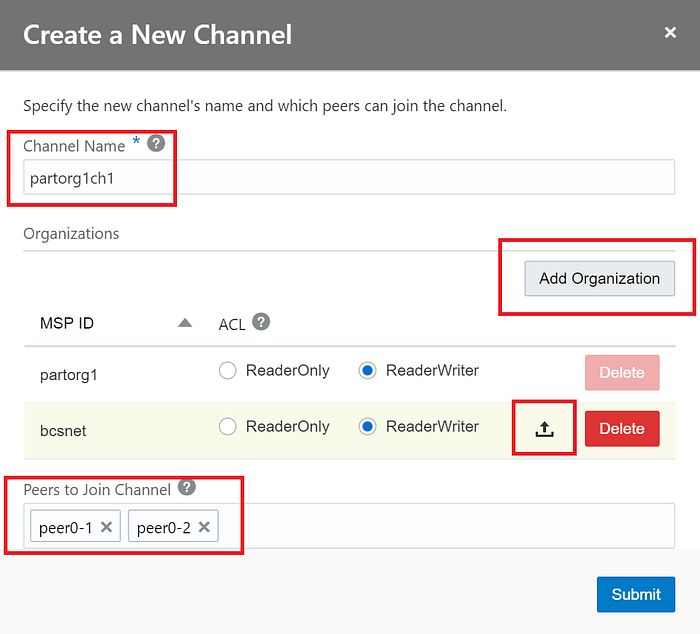
Provide the new channel information as shown below, including the channel name, and select the peer nodes that are supposed to join the channel.
In case you want you can add as many organizations as you need, just click the Add Organization button and provide its configuration file by clicking the icon with an arrow that points upwards.
Note that you are not able to delete a channel after it is created, so create your channels wisely.
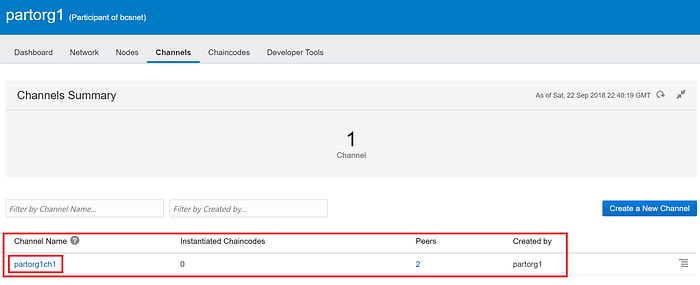
So on the next screens, you will see the channel you’ve just created as shown below:
Configure the Anchor Node
Now let’s configure the anchor node. In Hyperledger Fabric, the anchor node will be a peer node on a channel that all other peer nodes can discover and communicate with.
It somehow acts as the front controller and centralizes all the state replication and communication with other peer nodes in a given channel and the network at that point.
Each Member on a channel has an anchor peer (or multiple anchor peers to prevent a Single Point of Failure (SPoF), allowing for peers belonging to different Members to discover all existing peers on a channel.
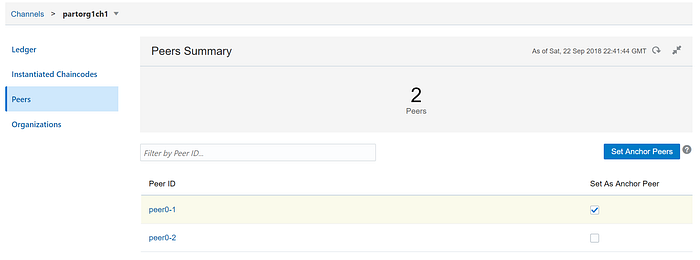
Click the channel name, click the peer link on the left and then select the checkbox for your desired peer node and click the Set Anchor Peers button as shown below:
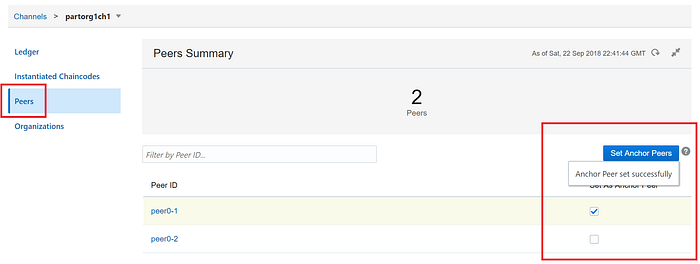
In the future in case you need to add more Participant Organizations or our peers to a given channel, just click the Hamburger component and select the desired option.
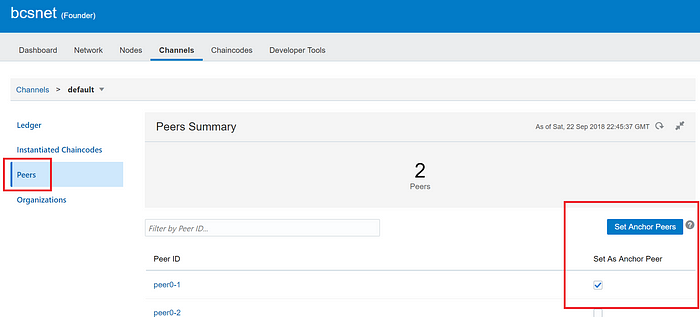
Go to the Network Founder console and do the same with the default channel.
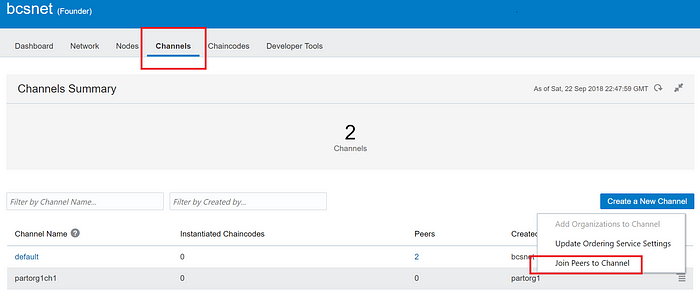
Add more Peers to a new Channel
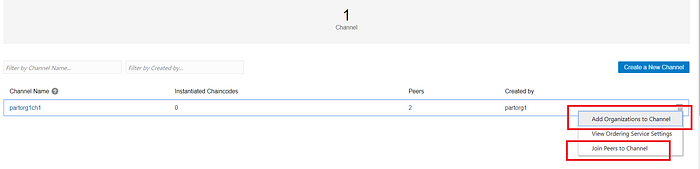
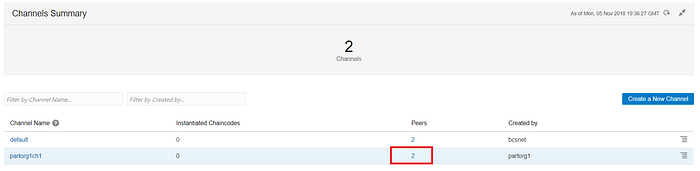
At last, make the Network Founder peers join this channel as well. Click the Channels tab, you will that your partorg1ch1 has no peers (0 — zero) yet as shown below:

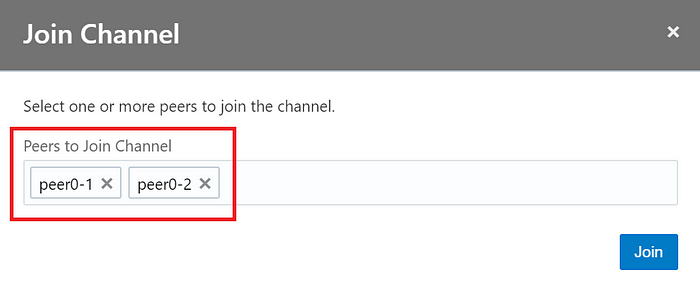
Click the Hamburger component, and select the Join Peers to Channel option as below:
Select the peers you want to add and click the Join button.
A success message will be shown and the number of peers for this channel will be updated on the Network Founder configuration.
Check the new Channel topology in Topology View
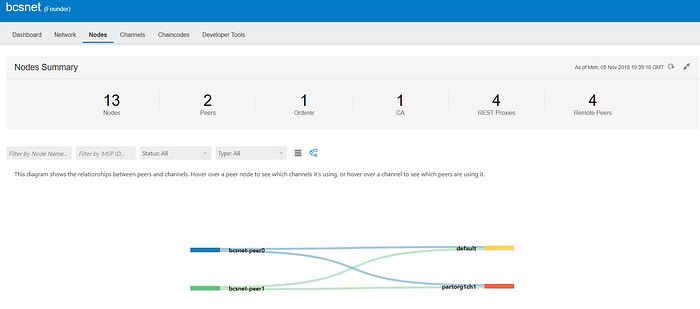
Select the Nodes tab, click the Topology View icon and you will see the new channel as configured in the steps above.
You can create as many channels as you need as well as add as many peer nodes as you might need, it’s totally flexible so that it can address your business and network topology needs.
Wrap up
That’s it! After the completion of all the steps above, our Blockchain network consortium will be configured and ready for our next step — the chaincode (smart contract) deployment.
In the next blog post, we’ll provide the steps required to deploy Blockchain smart contracts (chaincode).
Oracle Developers and Oracle OCI Free Tier
Join our Oracle Developers channel on Slack to discuss Microservices, Java, JDBC, Oracle Cloud Infrastructure, Oracle Database, and other topics!
Build, test, and deploy your applications on Oracle Cloud — for free! Get access to OCI Cloud Free Tier!
